Performance is a critical part of any Sitecore AI implementation. Rich components, experimentation, and AI generated content can easily hurt Core Web Vitals if you don’t continuously measure what’s happening in the browser.
In this tutorial, you’ll see how to integrate Google PageSpeed Insights directly into Sitecore AI Pages as a sidebar app:
- The app runs as a custom Sitecore Marketplace app in the Pages sidebar
- It connects to PageSpeed Insights via a backend endpoint
- It lets authors analyze any URL (including the current page)
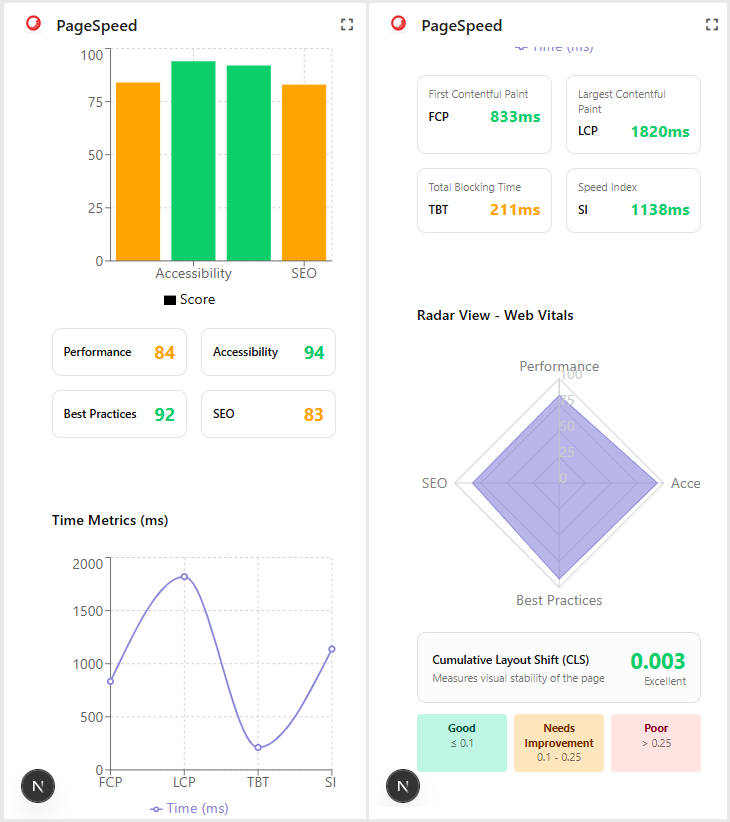
- It visualizes key metrics such as Performance, Accessibility, Best Practices, SEO, LCP, TBT, CLS, and Speed Index
The implementation is based on a working solution built with Next.js + TypeScript.
Why Integrate PageSpeed into Sitecore AI Pages?
Putting PageSpeed inside Pages has several benefits:
Developer‑friendly integration
A small React hook + Next.js API route encapsulates PageSpeed logic, so you can reuse patterns in other tools or dashboards.
Performance feedback where people work
Authors and marketers don’t need to leave Pages and paste URLs into an external tool. They can see performance while editing experiences.
Support for Desktop and Mobile analysis
PageSpeed Insights provides separate results for desktop and mobile. The sidebar lets you switch strategies from the UI.
Get the Code and Run It Locally
To follow this tutorial more easily, download the solution:
git clone https://github.com/gabrielbaldeon/pageSpeedSitecoreAI.git
cd pageSpeedSitecoreAI
Then:
- Open the project in Visual Studio Code.
- Get an PageSpeed Api Key at
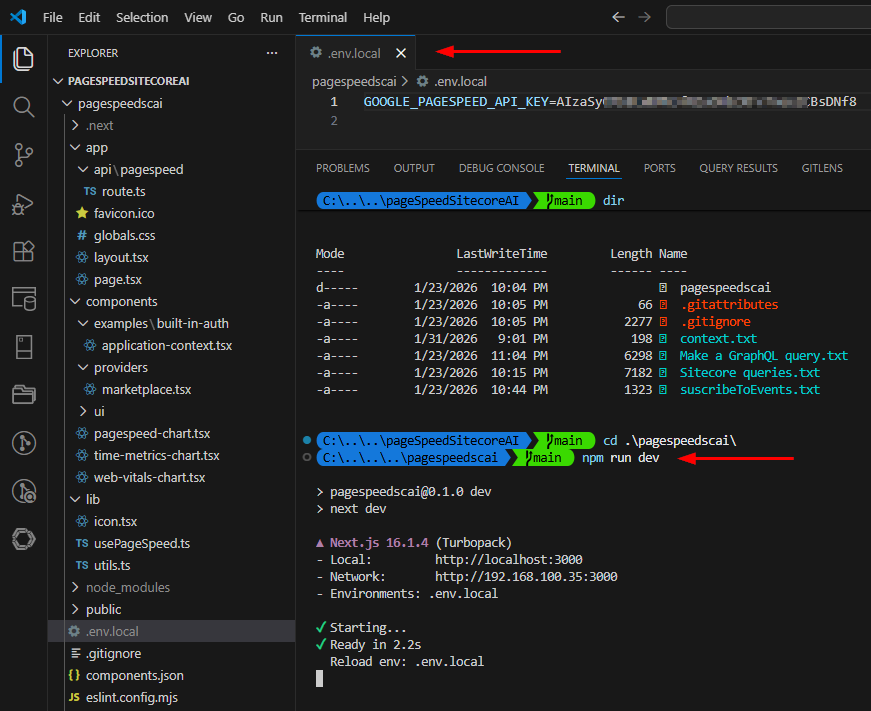
https://developers.google.com/speed/docs/insights/v5/get-started- Create a env.local file at the root of the solution (pagespeedscai folder) and set your PageSpeed API key:
GOOGLE_PAGESPEED_API_KEY=your-api-key-here- Install dependencies and run the dev server:
npm install
npm run dev
Once the app is running locally, you’ll later connect it as a custom Marketplace app and open it inside Sitecore AI Pages.
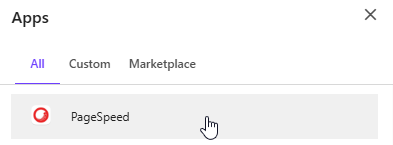
Then Open the brand new App configured in Sitecore Marketplace from the Pages Editor.
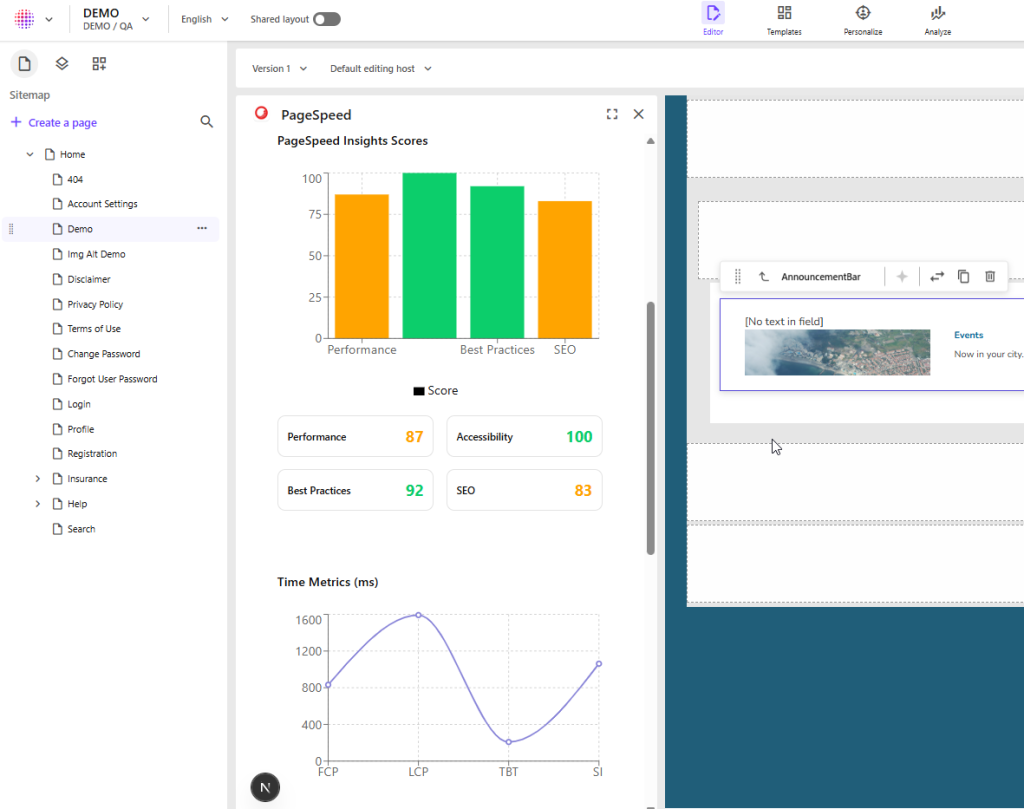
The App should appear in the left side of the selected page, the URL textbox will be populated with the Production URL of the current page.
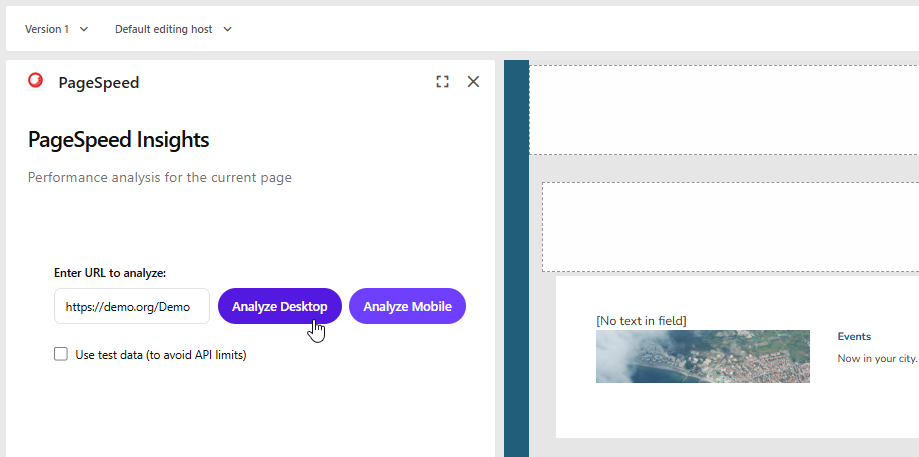
You can click on the buttons to Analyze the production page.
Furthermore, you can check the test checkbox to load the App with test data. You will get a pagespeed report like this:
In the following sectios I’ll describe the different modules of the solution and try to explan what they do.
The Base Marketplace App (Pages Sidebar)
The app runs as a custom Sitecore Marketplace app that appears in the Pages sidebar. To create this base application, follow the official Sitecore documentation:
Create a custom Marketplace app
That tutorial guides you through:
- Registering a new custom app in Marketplace
- Setting up the extension point so the app appears in Pages (e.g., as a sidebar panel)
- Configuring the iframe URL (the URL where your Next.js app is hosted)
- Declaring the permissions the app needs (e.g., to read the Pages context)
Once that basic app is running using the tutorial, you then:
- Replace / extend the starter implementation with your PageSpeed UI
- Make sure the Marketplace client is initialized in your code so you can read:
- application.context (general environment information)
- pages.context (site + page information, such as route and domain)
In this solution, the app uses the Marketplace client to:
- Provide context to the React components so they can build URLs and show relevant messaging
- Detect when it is running inside Pages
- Read the current site information (including published domain)
- Read page information (ID, language, route/path)
Getting the Page URL from Pages
In early iterations I tried to detect whether a page is “published” via GraphQL, but this is not reliable in all environments and can be fragile. In this tutorial, I’ll focus on a simpler behavior:
- Use the Pages context to build the URL (domain + route/path)
- Show that URL in the UI
- Let the user decide when to analyze
- If the live URL doesn’t exist yet (e.g., unpublished page), the PageSpeed API will simply return an error, which is displayed to the user. If the site is configured to show a custom 404 page, PageSpeed will analize that page, therefore, I suggest that you have to be sure that the page is published.
The general logic is:
- From pages.context, read:
- The site’s primary domain
- The route or path
- Combine them into a canonical URL:
- https://{domain}{route}
- Normalize slashes (no double slashes or missing leading
/)
- Pre‑fill the manual URL field with this value so:
- Authors can see what will be analyzed
- They can easily adjust it if necessary
The PageSpeed Backend Endpoint
To keep your PageSpeed API key safe and centralize error handling, the integration uses a backend route that the browser calls instead of calling Google directly.
In a Next.js app, this is implemented as a route handler under /app/api/pagespeed/route.ts
At a high level, it:
- Wraps errors into a predictable structure (with an error property), so the UI can display a friendly message.
- Reads the url and strategy (default mobile) from the query string.
- Builds the PageSpeed API URL with categories:
- performance
- accessibility
- best-practices
- seo
- Appends &key=GOOGLE_PAGESPEED_API_KEY if available.
- Forwards the request to Google and returns the JSON response to the browser.
With this in place, the browser only needs to call /api/pagespeed?url=…&strategy=mobile, and it never sees your secret key.
Building a Reusable PageSpeed Hook on the Client
On the client side, a React hook encapsulates:
- Calling /api/pagespeed
- Handling loading and error states
- Mapping the raw Lighthouse response into a simpler metrics object suitable for charts
1. Metrics model
Define a type that focuses on the values you want to show:
export interface PageSpeedMetrics {
  performance: number;     // 0–100
  accessibility: number;   // 0–100
  bestPractices: number;   // 0–100
  seo: number;             // 0–100
  fcp: number;             // First Contentful Paint (ms)
  lcp: number;             // Largest Contentful Paint (ms)
  tbt: number;             // Total Blocking Time (ms)
  cls: number;             // Cumulative Layout Shift
  si: number;              // Speed Index (ms)
}
2. Hook behavior
The hook:
- Takes url, useTestData, and strategy (mobile / desktop) as arguments.
- If useTestData is true, it returns mocked metrics (useful for demos and avoiding quota).
- Otherwise, it calls the backend route.
- It maps Lighthouse data into your PageSpeedMetrics model:
- Multiplies category scores by 100
- Rounds time metrics to integers
- Formats CLS to a few decimal places
- It returns { metrics, loading, error }.
Designing the Pages Sidebar UI
The sidebar UI brings everything together:
- It shows the current URL (from Pages context) or lets the user type one.
- It exposes Desktop/Mobile buttons to choose strategy.
- It has a “Use test data” checkbox.
- It uses usePageSpeed to call the backend and display results.
- It shows:
- A loading spinner while analyzing
- An error card if something goes wrong
- Charts when metrics are available
Conclusions and Possible Enhancements
By combining:
- A custom Marketplace app built following Sitecore’s tutorial
- The Pages context to derive URLs without over‑complicating publication detection
- A backend endpoint to call PageSpeed Insights
- A reusable React hook (usePageSpeed) for fetching and mapping metrics
- A Pages sidebar UI designed for authors and developers
you get a practical, integrated tool to keep performance visible inside SitecoreAI Pages.
From here, you can extend the solution by:
- Production Publich Check
You can check if the page is published before starting the analysis. I tried but it will require to tune it up - Adding historical trends
Persist PageSpeedMetrics per page and date to show how scores evolve over time. - Testing variants and segments
Use different URLs (with query parameters or test harnesses) to measure personalized experiences separately.
Using this pattern, you can keep your Sitecore AI Pages experiences not only personalized and intelligent, but also consistently fast and user‑friendly.