

In this two-part workshop, you’ll learn how to build an AI agent that allows content editors to interact with Sitecore XM Cloud using natural language. The agent uses Claude AI and Sitecore’s Model Context Protocol (MCP) to automatically execute actions.
We’ll build an AI agent integrated into XM Cloud Pages that:
- Receives natural language prompts from editors
- Analyzes and plans actions using Claude AI
- Automatically executes Sitecore tools via MCP
- Provides real-time feedback with execution logs
The AI Content Agent is a TypeScript-based Node.js application built with Next.js 14+, React 18+, and Tailwind CSS. It runs on Node.js 16+ and uses npm 10+ for package management, with development done in Visual Studio Code. The application requires JavaScript/TypeScript skills and familiarity with React hooks, async/await, and REST API concepts.
1. Initial Setup: Create an App in Sitecore Marketplace
First, we need to create an application in the Sitecore Marketplace:
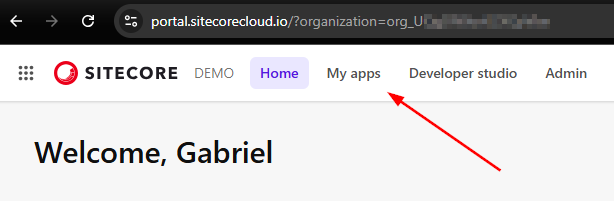
Step 1: Access to Sitecore Cloud Portal
- Go to https://portal.sitecorecloud.io/
- Login with your credentials
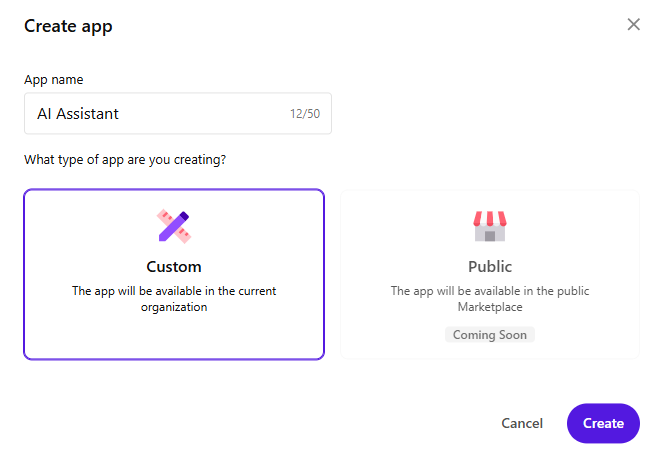
Step 2: Create and configure the Application
- Navigate to “My apps” and click “Create App“
- Set AI Assistant on the App name field
- Select Type Custom, click Create
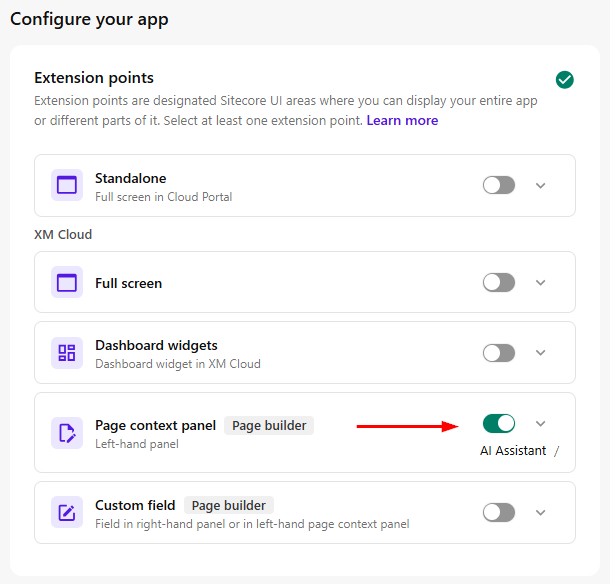
- Go to the “Configure your app” section
- In the Extensions points “turn on” the Page context panel.
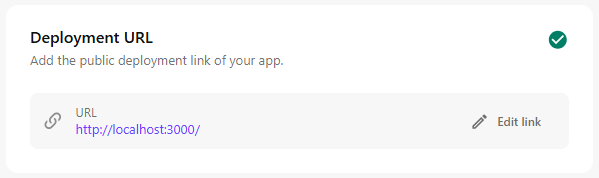
- Go to “Deployment URL” section
- In the URL set http://localhost:3000/
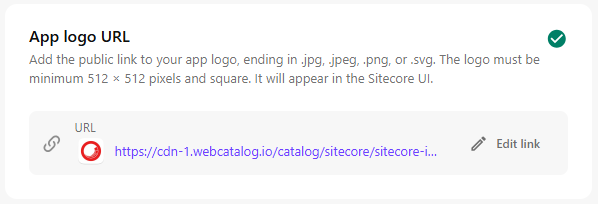
- Go to the “App logo URL” section
- In the URL set https://cdn-1.webcatalog.io/catalog/sitecore/sitecore-icon.png?v=1731337318728
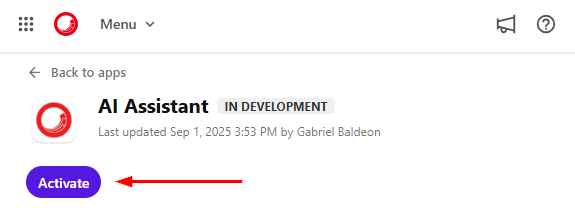
- Then, activate the App. Click Activate.
- Go to the My apps page and click Install
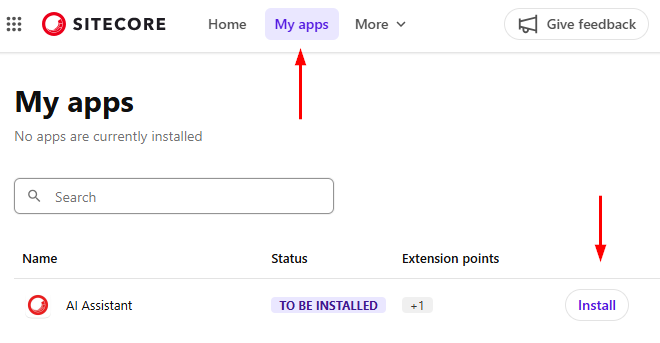
- Select the environment(s) and click Install

- To confirm the AI Assistant is installed, open the Page builder of your environment
- In the header click Apps and select AI Assistant
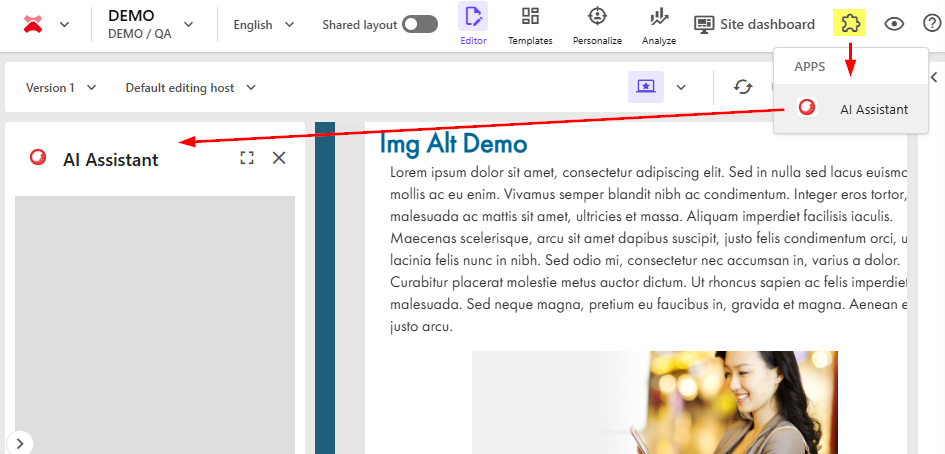
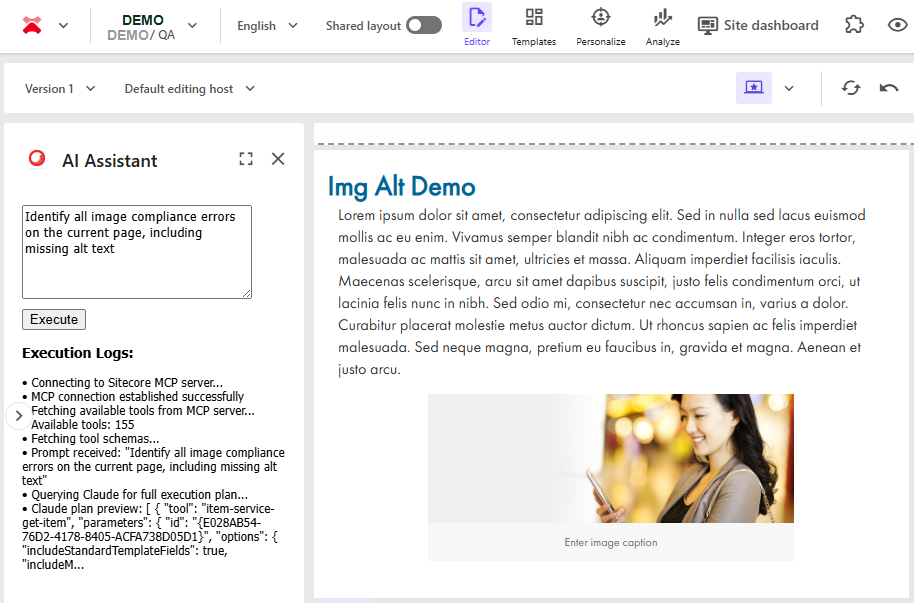
The AI assistant interface will be displayed in this section after we start the development server. At this stage, the area appears blank since we must first compile the codebase and run the application locally on port 3000 to visualize the fully functional interface.
2. Get Claude AI API Key
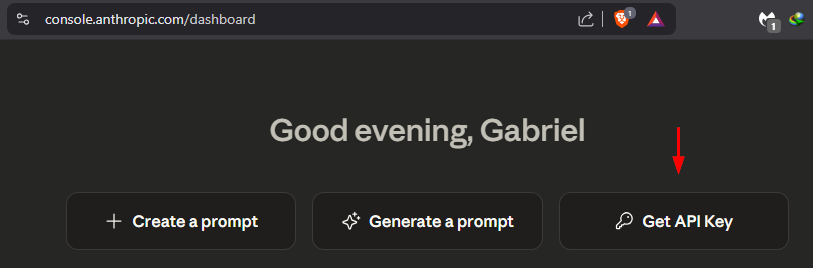
Step 1: Get Anthropic API Key
- Go to Anthropic Console
- Create an account or login
- Generate a new API Key in the dashboard
Copy and save the API key, we’ll use it in the env variables.
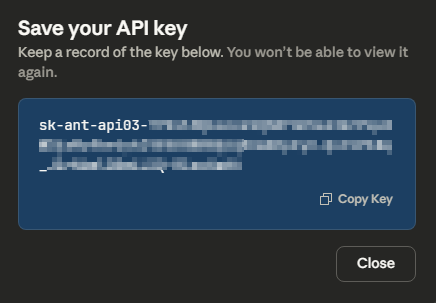
Note: Claude API usage is paid, so keep track of your usage. I bought and use a $5 credits plan.
In this first part, we’ve established the essential foundations by setting up our Sitecore Marketplace application and configuring Claude AI’s API access. Now that our development environment is ready and the basic structure is in place, we’re prepared to dive into the exciting implementation phase. In Part 2, we’ll bring our AI agent to life by implementing the core logic that connects Claude’s intelligence with Sitecore’s MCP tools, building the React interface for XM Cloud Pages, and testing real-world content automation scenarios.
Get ready to transform these configurations into a fully functional AI assistant that understands and executes natural language commands within your Sitecore environment!
Here’s the link to part 2