In this article, we’ll explore how to implement a Content Security Policy (CSP) using Cloudflare Workers on a Sitecore XP site. We will focus on the policy strict-dynamic, creating a dynamic CSP to allow the execution of scripts. Unlike using a hash-based CSP, implementing a dynamic CSP enables scripts to be updated at any time without the need to regenerate hashes and modify the policy.
This flexibility makes it easier to manage script changes while still maintaining a high level of security. By leveraging a dynamic CSP, we can streamline content updates and ensure that security controls remain effective without additional overhead.
Additionally, we’ll incorporate the use of nonces (unique values generated for each request) to authenticate permitted scripts, adding an extra layer of protection against attacks like Cross-Site Scripting (XSS). Throughout this process, we’ll demonstrate how this approach strengthens site security.
<Let’s get started />
In this guide, we’ll cover the following steps:
- Remove the existing CSP from the Web.config file
- Add a static nonce value to each script tag
- Create a Cloudflare Worker to handle the dynamic CSP
Step 1 : Remove the existing CSP from the Web.config file
To remove the existing CSP tag from the Web.config file in the root of your Sitecore site, locate the <httpProtocol> section, where the Content Security Policy (CSP) might be defined. Look for a line similar to the following:

Simply delete the CSP line, or comment it out, to remove the CSP configuration from the Web.config file:

This action will disable the existing CSP, allowing us to implement a new policy dynamically through Cloudflare Workers. Save and close the Web.config file after making this change.
Step 2 : Add a static nonce value to each script tag
Begin by adding a new setting to your Sitecore configuration file (*.config). In this example, we’ll define the setting with the name CSPStaticNonce and assign it a Base64-encoded value (28 characters long).

Next, we’ll retrieve the value of the CSPStaticNonce setting and apply it to every script tag on the site. In this example, we’re using MVC views, so open your main layout file (*.cshtml) and fetch the setting value. Assign it to Session[“Nonce”], and then pass it to ViewBag.Nonce for use in your views.

Find every script tag on the page and add a nonce attribute, assigning it the value from ViewBag.Nonce.

Test the implementation by opening the page and inspecting the source code. You should see that each script tag includes the static nonce value.

Step 3 : Create a Cloudflare Worker to handle the dynamic CSP
Login into the Cloudflare dashboard
In the left pane Click Overview below the Workers & Pagessection

Click the Create button

Then ClickCreate Worker

In the Worker Editor, assign a name to the worker (nonce-worker) and paste the code from the following link:
https://github.com/gabrielbaldeon/cspcloudflareworker/blob/main/worker.js

You’ll notice that the staticNonce in the Worker.js value matches the CSPStaticNonce generated in Step 2. Ensure that this value remains consistent across all instances to maintain proper functionality.
Click Deploy to publish the Worker.

Navigate to Worker & Pages/Overview and Open the new nonce-worker

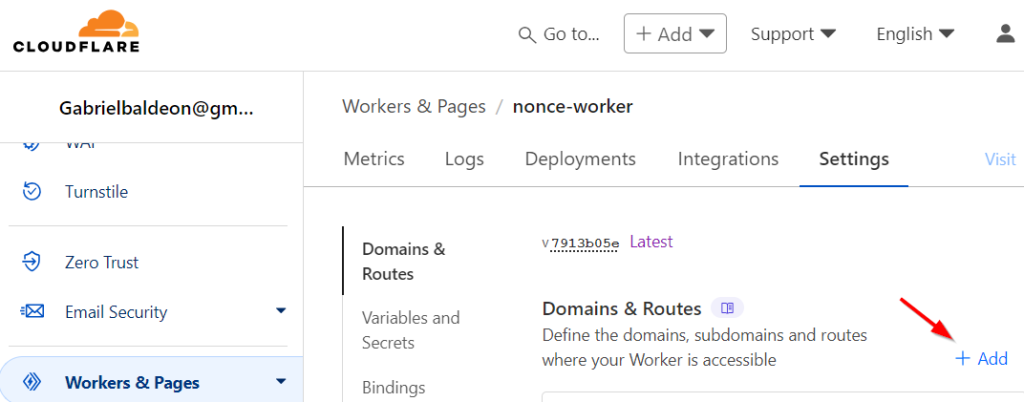
In the Settings tab Click “+Add” in the Domains & Routes section to associate a domain with the Worker

Then Select “Route”

In the Route input, select the Zone, which is typically the domain name you have registered with Cloudflare.
Then, enter your domain URL followed by /*. This ensures that the Worker will execute and apply the CSP to all routes within your domain.
Click Add route.

<That’s it! Well done/>
Test your page by opening the browser’s developer tools and verifying that the CSP is correctly injected. Ensure that the nonce attribute is present and randomly generated for each request.


